Thursday, 31 March 2016

HOW TO SET WHATSAPP PROFILE PICTURE WITHOUT CROPPING

Hello friends today I will tell you how you can set your whatsapp profile dp without crop. generally when we are set any profile dp on whatsapp firstly it says to crop the picture and then set. But now I have a trick by which you can set whatsapp profile dp without cropping. Follow below steps:

How to Set Up Whatsapp Profile Picture without cropping

At First, Install #SquareDroid — Full Size Photo app from here Download


After Successfully install, Now open the app, & you will see a Full menu in it. about “Pick a Photo” “Take a Photo” “Settings” etc.
Then Choose “Pick a Photo” option from here & It will show full menu, now select picture which you wanna set as profile picture without decreasing it’s size.
It will Automatically Resize That Picture & Picture will Crop instantly, Without Loosing anything in pic, & Pic will remains full & will not looks ugly after resize it.
So After Crop, Now Save the Picture in the Gallery & Open Whatsapp, & Set newly Created profile Picture Without loosing size.

Wednesday, 30 March 2016

How to change our name in FACEBOOK before 60 days if you have changed it recently?

According to Fb rules we can’t change our name before 60 days if we have changed it recently. But it is possible

Step -1) First of go to ‘Account settings’ and click on ‘Edit name’ and confirm that Limit is currently present or not.
Step 2) If the limit will be present Name will not
 be clickable and there should be a note about name change limit.
Step3) After checking out limit if you want to continue to change name then Click Here: https://www.facebook.com/hacked
Step4) Click on the Continue button. This link is actually for securing and recovering account from hack. So we will use it to recover our account and it will let us to change name in further steps.
Step5) Change your Account password and but don’t need to change any other information like email, mobile no etc.
Step6) After continuing they will show that you have recently changed your account name.
Step7)Then all the previously used names will displayed and select any of the listed name available there.

Note:- By Using this method you can change name infinite time whenever you want but the limitation is that we cannot able to use new name. So if you want to use new name then you can try request form or only part which left is waiting for 60 days.
I hope you enjoyed this trick.

How to Watch Security Cameras on the Internet

Want To see CCTV cameras On Your Internet? 
Here Is The Exploit!
1-Open your browser.
2-Go to http://www.google.com
3-Copy paste a code and put it in google click enter and bam you will get some cameras by clicking on the search links .
Here I have accumulated a list of Google Dorks that can be used to explore some of the IP cams that can be accessed Online without any Authentication .
inurl:/view.shtml
intitle:”Live View / – AXIS” | inurl:view/view.shtml^
inurl:ViewerFrame?Mode=
inurl:ViewerFrame?Mode=Refresh
inurl:axis-cgi/jpg
inurl:view/index.shtml
inurl:view/view.shtml
liveapplet
intitle:liveapplet
allintitle:”Network Camera NetworkCamera”
intitle:axis intitle:”video server”
intitle:liveapplet inurl:LvAppl
intitle:”EvoCam” inurl:”webcam.html”
intitle:”Live NetSnap Cam-Server feed”
intitle:”Live View / – AXIS 206M”
intitle:”Live View / – AXIS 206W”
intitle:”Live View / – AXIS 210″
inurl:indexFrame.shtml Axis
intitle:start inurl:cgistart
intitle:”WJ-NT104 Main Page”
intitle:snc-z20 inurl:home/
intitle:snc-cs3 inurl:home/
intitle:snc-rz30 inurl:home/
intitle:”sony network camera snc-p1″
viewnetcam.com
intitle:”Toshiba Network Camera” user login
intitle:”i-Catcher Console – Web Monitor”
Here is a Screenshot  :
How to Watch Security Cameras on the Internet

Tuesday, 29 March 2016

GOOGLE inbuilt offline game and its HACK.

HELLO GUYS ,Welcome to the USERX.

We’ve already seen how Google plans to make intermittent connectivity issues less of a hindrance through cache page loading malarkey.
Helpful as this may be the latest Canary builds of Google Chrome comes with a little extra sweetener. Hidden within the browser’s new-look ‘Network Error’ page is a cute, endless running game. It even features the ‘lonely t-rex’ character used to illustrate the browser’s error pages.
This button-mashing game certainly helps me channel my frustration pass the time while I wait for the network to solve itself. If you use Chrome Canary on Windows or Mac (or run Chromium from trunk on Linux) here’s how you can try it.
How to Play The Endless T-Rex Runner Game in Chrome.


Turn off your Wi-Fi connection (or use the developer tools in Chrome to simulate this). Then, open a new tab and load up a website. You’ll see the standard (though redesigned) Network Error page, topped by the lonely T-Rex glyph created by Google designer Sebastien Gabriel.

Typically at this point you’d close the tab and tut loudly, gesturing for the nearest barista to go and reboot the router. Instead, tap the space bar on your keyboard.

The lonely T-Rex at the top of the page will suddenly bounce. A stretch of land will appear before him. And then…he’ll start running.

Like other endless runner games the goal is simple: run as far as you can, for as long as you can, until you crash. You’ll need to keep mashing the space bar on your keyboard to help the T-Rex clear the conveyor belt of variously spaced, differently sized cacti.

Every 100 points marker is punctuated by a screeching high score blip.

HOW TO HACK IT????

Google Chrome Runner game is written in JavaScript . So it is easily hack-able by changing some function using chrome console you can easily hack it .


Lets do it :

  • Disconnect internet & try to open any webpage.
  • Now you got screen says "Unable to connect internet" Now by pressing space button google chrome Runner game started.
  • Right click on chrome page & select "Inspect element ".
  • A new window open within that page then click on console
  • Now If You wanna See functions define for Runner Game .Type  below instruction in console.
    1. Runner.prototype
    2. Now Modify GameOver Function to hack this game
    3. Runner.prototype.gameOver=function (){console.log("codecops.in")}
    4. You are done ,Now you are not gonna Die {Try game} :P . But speed of Dinosaur is very slow so lets make it faster.
    5. Runner.instance_.setSpeed(1000)
    6. NOW YOU ARE IMMORTAL ENJOY!!!!! BY USERX


Monday, 28 March 2016

CALCULATIONS ON COMMAND PROMPT (CMD)

THE COMMAND PROCESSOR CMD.EXE COMES WITH A MINI CALCULATOR THAT CAN PERFORM SIMPLE ARITHEMATIC ON 32BIT SIGNED INTEGERS.

THESE COMMANDS ARE:

C:\>set/a2+2
C:\>set/a2*9
C:\>set/a(2*9)/2

NOTE: We had had to quote the shift operator since it would otherwise be misinterpreted as a "redirect stdout and append operator".

FOR MORE INFORMATION ,type "set/?" at the CMD.

HERE "+" stands for ADDITION.
"*" stands for MULTIPLICATION.
"/" stands for  DIVISION.


Saturday, 26 March 2016

How To Create Bootable USB Without Any Software In Windows 10 (Using Command Prompt)

Create Bootable USB without any software on Windows :


  • Insert your USB flash drive to your computer.
  • Search for ‘cmd’ in Windows 10 from the taskbar, Command Prompt will appear. Alternatively, you can also open the  Command Prompt by pressingwindows+R at the same time and typing in ‘cmd’ in the ‘Run’ window and hitting enter.
  • Right click on Command Prompt and select ‘Run as Administrator’ in case you have searched for cmd in the Windows 10 Taskbar.
  • Once the Command Prompt window appears, type diskpart and hit enter. Wait until the diskpart utility runs in another window.
  • In the new diskpart window, type list disk and hit enter. It will show you all active disks on your computer.
Most probably, you will see two Disk types.
  • Disk 0 for hard drive and,
  • Disk 1 for your USB Flash Drive with its total capacity.
Since we are going to work on to create bootable USB drive, we will work with Disk 1.
  • Type select disk 1 in the same windows and hit Enter. You will get a message ‘Disk 1 is now the selected disk’. That means, any further operation that you do will affect your disk 1 directly.
  • Type clean and hit Enter to remove all of the data in the USB drive. Clean command will format your bootable drive. You will get a message like ‘Diskpart succeeded in cleaning the disk’.
  • Type create partition primary and hit Enter. You will get a message likeDiskpart succeeded in creating the specified partition.
  • Type select partition 1 and hit Enter. It will choose partition 1 for setting up it as an active partition.
  • Type active and hit Enter. It will activate the current partition.
  • Type format fs=ntfs quick and hit Enter. This command will format your current partition as NTFS file system quickly.
  • Type exit and hit Enter. Exit command will close the Diskpart program. But do not close the command prompt Windows.
Now before we proceed, let us assume that the USB drive is the G: drive and the DVD installer is located on drive E:. And, you also have inserted a DVD inside the DVD drive from where you want to copy the data to create a bootable USB drive.
By default, Command Prompt’s active directory for Administrator permission is on C:\Windows\System32>. We will navigate Command Prompt to set on DVD (E:) as its active directory. Remember there should be a DVD inside DVD installer.
  • Just type E: then hit Enter, and then the active directory is changed to E.
  • Type cd boot and hit Enter. Now the active directory is changed to E:\boot>
  • Type bootsect /nt60 g: and hit Enter. It will create the boot sector on G: drive (USB Flash drive).
  • Type exit and hit Enter to close the Command Prompt.
Until this step, we have been successfully able to create a bootable USB drive and the flash drive is ready to be used as a boot media.
To install Windows from a bootable USB drive, we just need to copy the whole installation files contained on the DVD installer to the USB flash drive.
  • To do this, open the Command Prompt as in previous steps.
  • Once the command prompt is open, type xcopy e: \ *. * G: \ / E / H / F and then press Enter. Wait until all the files in the DVD installer are copied onto the flash drive.
Now bootable USB drive is ready to be used for installing Windows from the Flash drive and you’re done.

Samsung Galaxy S7 hack allows you to use Dual-SIM and MicroSD together

Samsung Galaxy S7 edge hack will allow you to use microSD and dual SIMs at same time

Samsung has launched its new flagship, the Galaxy S7 and S7 Edge. While both the new Samsung smartphones have been heartily welcomed by Android fans worldwide, they lament the fact that Samsung has not provided a separate slot for SIM as well as MicroSD card in the dual-SIM enabled Galaxy S7 Edge smartphone.
The Samsung Galaxy S7 Edge dual-SIM smartphone version buyers can either choose additional storage through microSD card and a single SIM card or dual SIMs and no additional storage. However resourceful hackers have found a way to bypass this restriction and add both dual-SIM and microSD capability to the Galaxy S7 Edge smartphone.
The hack which has surfaced online requires some modifications to your SIM card and your microSD card so that you can use both SIM slots and a microSD card at the same time. Do remember that the modifications are risk and you might destroy your SIM card and your microSD in the process. There is also a chance you might damage your new smartphone, so beware.
For modification process you need a nano SIM card, lighter, scissors, tape or glue, memory card, and the willingness to risk your new Samsung Galaxy S7 Edge. This hack requires you to heat up the back of the SIM card and then hack the actual SIM chip away from the plastic backing leaving you with only the gold contacts and no plastic surrounding it. You then have to precisely trim that SIM card.
Once you have the card trimmed per the steps according to a tutorial posted by noreplied, you have to glue or tape the SIM chip to your microSD card in a precise location.
maxis-hot-link-sim
The modification also requires some precise and skillful engineering especially while removing the chip from the Nano SIM.
celcom-sim-remove-1
Next, with the same precision you have to trim your SIM card.
nano-sim-chip-trim

As it turns out the trimmed SIM card can fit onto the microSD card in such a way that the contacts for the memory card can be read at the same time the SIM is read in the dual-purpose slot.
attach-nano-sim-micro-sd
If you trim and glue precisely enough, you should be able to configure the new SIM card with the dual SIM manager application in Galaxy S7 Edge.
If you see the dual-SIM option that means you have done a pretty good engineering job. Once done, your engineering feat will give you both a second SIM card and additional storage to enjoy for your content.
Remember you have to follow all the steps precisely otherwise you may end up messing your brand new Samsung Galaxy S7 Edge smartphone.

Friday, 25 March 2016

Hacking ISP for free internet or Bypass ISP Login Page!

Hello Guys,
Team UserX Here! In this  post, I m gonna share with you an awesome trick to bypass your ISP login page and gain internet access for free. This trick is work on allWAN networks except Dial-up networks. Networks which uses a username and password to connect are known as PPPoE will not work with this trick because every client uses a different username and password. But it will work on Static IP and DHCP networks!

Required Software:

Netcut: This is a software which finds IPs and MAC or Physical addresses of the connected clients in your network. There are hundreds of users and sometimes thousands in a particular ISP. This software has a user-friendly interface which is quite easy for beginners.

Steps for Getting Free Internet!

  1. Download Netcut
  2. Install Netcut and run it.
  3. Now, you have to allow perhaps 10 seconds for the software to scan the connected clients and show their information.
  4. Now, as mention earlier that it will only work on DHCP and Static IP networks. You have to choose any one client and copy down it’s MAC Address and IP address in Notepad.
  5. Now we will have to change our computer’s Physical address and IP address. First of all, you have to go to Network and Sharing Center. Then click on Change Adapter Settings and right click on your adapter name and then click on Properties.
  6. Now click on Configure and move to Advanced tab. Then look forNetwork Address in the list, and then you will find that it is set to Not Present. Now tick or check Value and type the MAC address you copied from Netcut. This will restart your adapter, so wait 10 seconds until it reconnects properly.
  7. Now, it’s time to apply the IP we copied from Netcut. Now right click on your adapter name and click on Internet Protocol Version 4 (TCP/IPv4) and click on Properties. Now click on Use the following IP address.
    Fill the blanks like this:
    IP Address: Put the IP you got from Netcut.
    Subnet Mask: Use the same subnet mask you got from your ISP.
    Default Gateway: Use the same gateway IP you got from your ISP.
    To find the Subnet mask and Default gateway, you have to open upCommand Prompt and type this command: IPCONFIG and you will find the subnet mask and gateway.
Congrats: You now have a free internet connection!
Note: 
If one client is not working, use another!
Keep Hacking! Stay tuned 

Sunday, 20 March 2016

Run Windows XP on Android


Hey Guys Welcome UserX:The Dark Net,
We're Back this weekend with another cool tricks for our visitors, we hope that you are enjoying our tips and tricks , which we keep post for you guys, just let us know to make your experince better with UserX.

Now , back to the point , so if u really freaking about using  an PC operating System on your Android Device , then this trick is for you guys.
Actually you can install a number of OS on your android device , but this one WinXP is bit an easy task , as it does not require huge memory size and RAM.

So let begin , we have posted links to get your job done in simple and easy steps.


1.For Youtube video :- Click Right Here
     
 
                             OR


2.For textual instructions  (Step by Step) :- Click right here.

Friday, 18 March 2016

GOD MODE (HIDDEN FEATURE OF WINDOWS)

It may be a stupid name, but Windows 7's God Mode is indeed omnipresent. It conveniently puts hundreds of settings from all around the operating system all in one place.

To turn on God Mode, create a new folder on your desktop--or anywhere you'd like--and name it: GodMode.{ED7BA470-8E54-465E-825C-99712043E01C}. Don't include the final period. The resulting folder will contain 270 items, representing virtually every configurable option in Windows 7.

                                          HERE IS A VIDEO TUTORIAL TO DO THAT


HOW TO USE CALCULATOR AS A BROWSER.(ONLY ON WINDOWS XP)

HELLO FRIENDS.WE ARE BACK WITH A NEW SMALL TRICK.IF YOU HAVE NO BROWSER INSTALLED IN YOUR PC (NOT EVEN INTERNET EXPLORER) .SO YOU CAN BROWSE ANY URL WITH THE HELP OF CALCULATOR OR PAINT. SO LETS GET STARTED.Step1. Click Start --> Run --> and type mspaint or calculator
Step2. Once you open one of these program press F1
Step3. Place your mouse curser on the yellow question mark and right click it and click "Jump to URL"
Step4. Once you press that you will have the option to put an address bar. NOTE: You need to input all the address including "http://"BEST OF LUCK.NOTE ;THIS TRICK WILL ONLY WORK ON WINDOWS XP.


ENJOY. BY USERX
COMMUNITY

HOW to make a folder named 'CON' and nothing named folder in WINDOWS.

HELLO GUYS .Have you ever tried to create a CON FOLDER or any folder with names such as “con”, “prn”, “nul” “com1” “com2” “lpt1” etc. but failed? Is it impossible to create folders with such names in windows? If you have tried it then you have seen a pop up message showing some error.


So,how to make a CON folder using alt key and numeric keypad.
1. Create a New folder (Right-click -> New -> Folder)
2. Once the new folder is created, right-click on it and select the option “Rename”.
3. Hold down the ALT key and type 0160 from the numeric keypad (ALT+0160) and release the ALT key.
4. Now, the folder name should go blank so that you can type any name of your choice such as “con”, “prn” “nul” etc. and press Enter. That’s it, you’re done!
REASON BEHIND THIS ERROR: These names represent the internal devices of the operating system and hence we cannot create folders with the above names.

NOTE: YOU can also make folder named like 'prn' , 'nul' ,etc. by this method.FOR MAKING A BLANK NAMED FOLDER ,DO NOT WRITE ANYTHING.


ENJOY>BY USERX

How to Add Pattern Lock on Windows 10/8.1/8/7 PC/Laptop

# Using Eusing Maze Lock: (Awesome Pattern Lock Software)


Hello, Everyone Here is Esusing Maze Lock is a new security software for Windows OS Computer. It is the powerfull tool by using which you can safely lock and unlock your computer with a Single click on the tray icon.

Steps to Follow:

  • At first Download Eusing Maze Lock from given link.
  • Once the downloading is complete, Install it normally just like any other software.
  • Go to system try icons, Right click on Eusing Maze Lock icon and click on Configure as shown in picture below
  • After installation, it will ask for default pattern. The default pattern is like Z letter form. Now click on Reset Pattern to change the pattern to your choice.
  • DOWNLOAD Eusing_Maze_lock_by_Userx.exe

Features of Esusing Maze Lock :


  • It’s new pattern based technique to lock and unlock your computer.
  • It offers quick and safe computer lock by mouse click, or hot key.
  • You can make your computer auto lock when computer is idle.
  • Your computer will be safely locked when windows startup.
  • You can turnoff the monitor based on your choice.
  • You will be able to change the alert text.
  • Esusing Maze Lock have 3 different built-in patterns: 3×3, 4×4, 5×5.
  • You can use custom lock screens background image.
  • It offers transparent screen lock feature.
  • Esusing Maze Lock support multiple monitors.
  • you can use the dynamic password technology to prevent key loggers.
  • It can disconnect internet access when your Computer is locked.
  • You can backup your own pattern feature.
  • It will display the date and time on locked screen.
  • No security issues, it’s 100% Spyware FREE, NOT contain any Adware, Spyware or Viruses.

How to install external apps on NOKIA 220 and NOKIA 225.

HELLO Guys ,WELCOME.TODAY ,I am going to show you how to install apps on NOKIA 220 and 225.

I have seen a lot of people getting trouble in finding and installing apps for their Nokia 225 & 220. To help them I made this beautiful tutorial, explaining everything about the phone.If you bought this phone then you may know that you cannot install any java based application in it. But why?

IT is so because,Nokia 225 and 220 uses 30+ series Operating system for mobile devices, which is not a Java OS and it is compiled using C and C++. As a result, you cannot install any Java (.jar) apps.

Nokia 30+ series is an operating system which is developed and used by only MICROSOFT. These mobiles are powered by mediatek chipest.
  • These Phones use MRE apps and the Default file extension of Nokia series 30+ is .Vxp.
Some apps may not work.This is a RAR FILE.

Download: https://drive.google.com/file/d/0B6-j2v8pzJM_VTdRMXIxaWI2dEk/view?usp=sharing  


HERE IS A PROOF OF THIS:

ENJOY BY USERX TEAM.


Thursday, 17 March 2016

How to enable virtual assistant for ANDROID.

Hello guys.I think you have seen the new iPhone assistant siri .This function of iPhone is quite amazing.So guys I am going to show you 'how to enable hands free function in android'.If u want to use this function properly then u have to root your phone.First of all update your Google app and then download open  mic + from playstore .Then download commandrr apk from Google play store.From comandrr u can edit ur commands.Don't download tasker app if asked.Now open open mic + and touch play button.And try to say the hotword you have selected and then speak the commands.Note : All commands are case sensitive.

POINTS TO BE NOTED : 1) This thing will not work on those devices in which GOOGLE launcher is installed.
2)Don't use tasker app .It will not work.

Enjoy. USERX COMMUNITY.

Sunday, 6 March 2016

Speed Up Your Android Device!(NO ROOT)

Hey What's up  Guys,  Welcome to UserX

Today I'am gonna tell you a secret trick in your Android Device which can be used to speed up your device . I mean isn't it cool to be  a fast processing device? The same device you used for couple of months can work faster by a small trick.


All you have to do is follow the instruction below :-

Step 1. Close anything that is being running in the background.

Step 2. Now navigate to Settings , then About Phone.


Step 3.In About phone option, you will see some thing like "Build Number" , just go to that and keep tapping it about 9 times  (Be quick )


After that you will see a message saying "Now you are a developer"

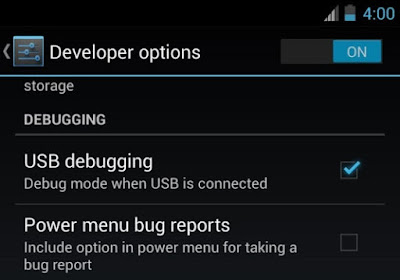
Step 4. No go back to stetting again ,and you will see a new option called "Developer Option"


Head to Developer Options(make sure it is turned on at top of your screen) , and navigate to

         (i).Window animation scale  (change it to 0.5 {minimum the number , fast is processing})
        (ii).Transition animation scale (change it to 0.5)
       (iii).Animator duration scale(change to 0.5 too)
By default these are 1 , you have to change to 0.5 one by one.


Quit everything and feel the difference and let us know if you face any problem.

Thanks.